A clean mattress is one of the most important parts of a healthy home. Yet it is also one of the most overlooked. Most people wash their sheets regularly but rarely think about what is happening underneath. Dust mites, dead skin cells, sweat, and allergens build up over time. Without proper cleaning, your mattress becomes a hidden source of poor sleep and health issues.
The good news is that cleaning a mattress does not have to be complicated. With the right vacuum cleaner and a solid plan, you can get impressive results in just a couple of hours. This article walks you through everything you need to know — from preparation to finishing touches.
Why Your Mattress Needs Regular Deep Cleaning
Most people spend around six to eight hours in bed every night. That is a lot of time for your body to shed skin, sweat, and hair onto the surface beneath you. Over months and years, this material builds up inside the mattress fabric and layers.
Dust mites thrive in this environment. They are microscopic insects that feed on dead skin cells, and they are found in nearly every home. Their waste particles are a common trigger for allergies and asthma. Therefore, reducing dust mite populations through regular cleaning is a genuine health benefit — not just a cosmetic one.
Additionally, spills, pet dander, and mold spores can work their way into your mattress over time. A good deep cleaning guide helps you tackle all of these issues systematically, rather than just treating the surface.
Choosing the Right Vacuum Cleaner for the Job
Not all vacuum cleaners are equal when it comes to mattress cleaning. The machine you use matters just as much as the technique.
What to Look for in a Mattress Vacuum
Power and suction strength come first. A vacuum with at least 200 watts of suction is a good starting point for mattress work. Stronger suction pulls more debris from deep within the fabric layers.
Filtration is equally important. Look for a vacuum with a HEPA filter. HEPA filters trap tiny particles, including dust mite waste and allergen fragments, instead of pushing them back into the air. This is especially valuable for people who suffer from allergies.
An upholstery attachment is essential. This flat, wide-mouthed tool is specifically designed for soft surfaces like mattresses, sofas, and fabric headboards. It allows for smooth, even coverage without damaging the material.
Some vacuums are designed specifically for bedding and mattresses. These handheld models often include UV light technology that kills bacteria and dust mites on contact. They are compact, easy to use, and very effective. However, a standard vacuum with the right attachments works well too.
Corded vs. Cordless
A corded vacuum delivers consistent power throughout the cleaning session. Cordless models are more convenient but may lose suction toward the end of the battery cycle. For a thorough mattress clean, a corded vacuum or a high-quality cordless model with a long battery life is the better choice.
Preparing Your Mattress for Cleaning
Good preparation makes the cleaning process faster and more effective. Do not skip this step.
Start by stripping all bedding from the mattress. This includes sheets, pillowcases, mattress protectors, and any mattress toppers. Wash all of these in hot water immediately. Hot water kills dust mites and removes allergens from fabric.
Next, move the mattress to a well-ventilated area if possible. Fresh air and natural light help loosen surface debris and reduce moisture inside the mattress. If you cannot move it, open windows to improve airflow in the room.
Take a close look at the mattress surface. Note any stains, odors, or visible spots that might need extra attention. This quick inspection helps you plan your approach before vacuuming begins.
Step-by-Step Guide to Vacuuming Your Mattress
Now that your mattress is stripped and ready, it is time to vacuum. Follow these steps carefully for the best result.
Step 1: Attach the Upholstery Tool
Fit your vacuum with the upholstery attachment. If your vacuum came with a crevice tool, set that aside for use later along the edges and seams. Begin with the flat upholstery head for the main surfaces.
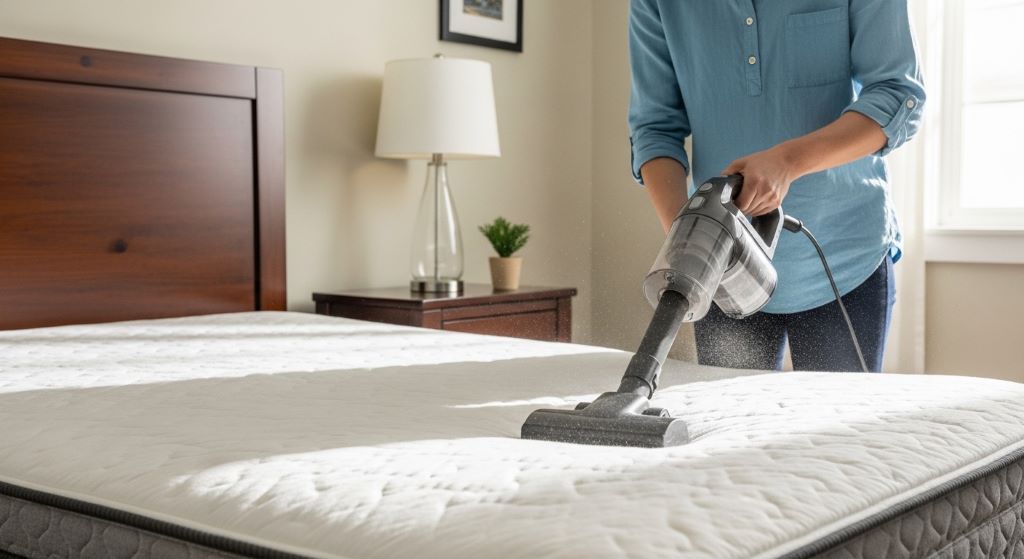
Step 2: Vacuum the Top Surface
Work in slow, overlapping rows across the entire top of the mattress. Think of it like mowing a lawn. Move the tool in one direction first, then go back over the surface at a right angle. This cross-pattern approach lifts more debris than a single pass.
Apply gentle downward pressure as you go. This helps the suction reach beneath the surface fabric. Do not rush. A slow and steady pace gives the vacuum time to pull out embedded particles.
Step 3: Clean the Sides and Edges
Switch to the crevice tool for the sides of the mattress. These areas collect a surprising amount of dust, hair, and lint. Run the tool along all four sides, including the seams where the top panel meets the sides.
Pay special attention to the piping — the cord-like edging that runs around the perimeter. Dust tends to collect in the groove beneath it.
Step 4: Flip or Rotate and Repeat
If your mattress is double-sided, flip it over and repeat the entire vacuuming process on the other side. Even if you sleep only on one side, the underside accumulates dust and can develop mold if left uncleaned.
If your mattress is not flippable, rotate it 180 degrees instead. This changes the position of the sleep surface and allows you to vacuum the previously unexposed end more thoroughly.
Treating Stains Before or After Vacuuming
Vacuuming removes dry debris, but it will not lift liquid-based stains. These need a separate treatment. Handle stains before putting your bedding back on, either before or after vacuuming depending on their condition.
For fresh stains, blot with a clean cloth immediately to absorb as much liquid as possible. Do not rub, as this pushes the stain deeper into the fibers.
For older stains, a simple paste of baking soda and cold water works well on many types. Apply it to the stain, let it sit for 30 minutes, and then blot it away with a damp cloth. For protein-based stains like blood or sweat, a small amount of hydrogen peroxide can be effective. Always test any cleaning solution on a hidden corner of the mattress first.
After treating stains, allow the mattress to dry completely before replacing bedding. A damp mattress creates conditions where mold and mildew thrive.
Deodorizing Your Mattress Naturally
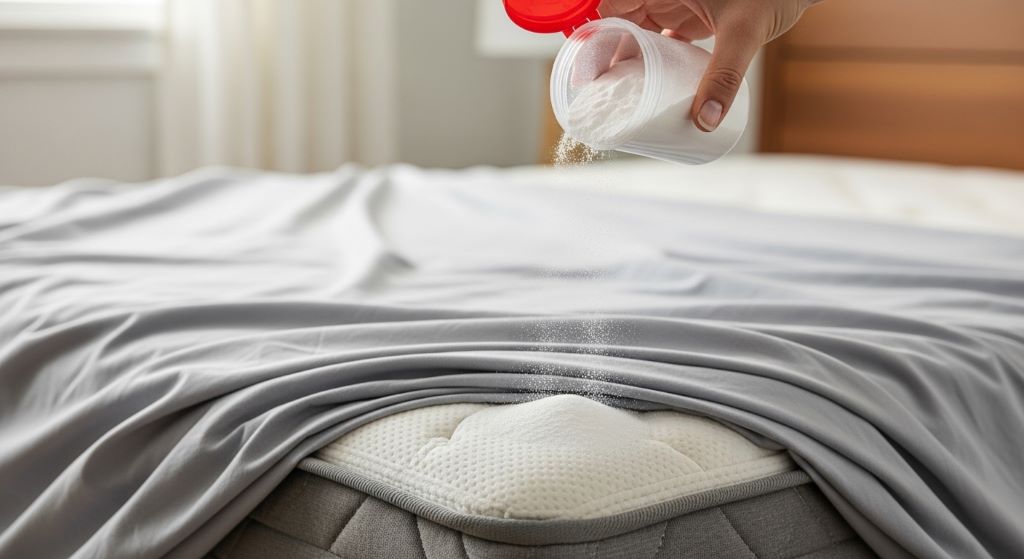
A vacuum removes particles, but it does not always eliminate odors. This is where baking soda becomes your best friend.
After vacuuming, sprinkle a generous layer of baking soda across the entire top surface of the mattress. Baking soda neutralizes acidic odors caused by sweat and body oils. Leave it on for at least one hour. For a deeper deodorizing effect, leave it for several hours or even overnight.
Once the time is up, vacuum the baking soda off completely. Use the upholstery tool again and take your time. Baking soda is fine-grained and can settle deep into the fabric, so a slow pass is important.
Adding a few drops of lavender essential oil to the baking soda before sprinkling it can leave a light, pleasant scent. This is optional, but many people find it adds to the overall freshness of the bed.
How Often Should You Clean Your Mattress
Frequency depends on your lifestyle, but there are some general guidelines worth following.
Vacuuming your mattress every one to three months is a reasonable routine for most households. If you have pets that sleep on the bed, or if anyone in the home suffers from allergies, monthly vacuuming is a better approach.
A full deep cleaning, including deodorizing and stain treatment, should happen at least twice a year. Many people find it easiest to schedule this alongside seasonal changes — once in spring and once in autumn.
These home hygiene tips are simple to build into an existing routine. Pairing mattress cleaning with sheet-washing day keeps things efficient and consistent.
Protecting Your Mattress Between Cleanings
A mattress protector is one of the smartest investments you can make. It acts as a physical barrier between you and the mattress. Most are waterproof, which means spills stay on the surface rather than soaking into the layers below.
Choose a protector that is breathable. Some low-quality options trap heat and make sleeping uncomfortable. A good protector is thin, barely noticeable, and easy to wash in a standard machine.
Additionally, airing your mattress regularly helps. Once a week, pull back the covers and let the mattress breathe for 30 minutes before making the bed. This reduces moisture buildup and slows the growth of mold and mildew.
Rotate your mattress every three to six months as well. This prevents uneven wear and keeps the sleep surface fresh across different areas.
Common Mistakes to Avoid
Even with good intentions, people often make small errors that reduce the effectiveness of mattress cleaning.
Using too much liquid is a frequent problem. Mattresses absorb moisture quickly and dry very slowly. Over-wetting the surface leads to mold growth inside the mattress, which is difficult to remove and can cause serious health problems.
Another common mistake is rushing the vacuuming. Moving the vacuum too quickly across the surface means less suction contact time per inch. This leaves behind much of the debris you are trying to remove. Slow and deliberate strokes make a real difference.
Skipping the sides is also a mistake many people make. The edges and seams of a mattress are high-traffic zones for dust and debris. Neglecting them leaves a significant portion of the mattress uncleaned.
Finally, replacing bedding before the mattress is fully dry is a problem. Trapping moisture under sheets creates a warm, humid environment that encourages bacteria and mold. Always confirm the mattress is dry to the touch before covering it.
Conclusion
Keeping your mattress clean is one of the simplest ways to improve your sleep quality and overall health. A good vacuum cleaner with the right attachments makes the process straightforward. By working slowly and methodically — from the top surface to the sides and seams — you remove dust mites, allergens, and debris that accumulate over time.
Combine regular vacuuming with baking soda deodorizing, prompt stain treatment, and a quality mattress protector. Together, these steps form a complete approach to mattress care. Following this deep cleaning guide twice a year, and vacuuming every one to three months, puts you well ahead of the curve.
Your mattress is where your body recovers each night. It deserves the same attention you give to the rest of your home. With a little time and the right tools, you can keep it fresh, clean, and healthy for years to come.
Frequently Asked Questions
How long does it take to deep clean a mattress with a vacuum?
A thorough vacuum of both sides typically takes 20 to 30 minutes. Adding deodorizing with baking soda extends the process to one to several hours, depending on how long you leave the baking soda to sit.
Can any vacuum cleaner be used on a mattress?
Most vacuum cleaners can be used on a mattress as long as they have an upholstery attachment. However, a vacuum with a HEPA filter delivers much better results for allergy sufferers, as it traps fine particles instead of recirculating them.
How do I get rid of the musty smell from my mattress?
Baking soda is the most effective natural deodorizer for mattresses. Sprinkle it generously over the surface, leave it for several hours, and then vacuum it off completely. Repeat if the smell persists.
Is it safe to use hydrogen peroxide on a mattress?
Yes, diluted hydrogen peroxide is generally safe for treating protein-based stains on a mattress. Use a small amount, blot rather than rub, and allow the area to dry completely before covering it. Always test on an inconspicuous area first.
How do these home hygiene tips help with allergies?
Regular vacuuming with a HEPA-filter vacuum removes dust mite waste, pet dander, and other common allergens from the mattress surface. Pairing this with hot-water washing of all bedding significantly reduces allergen exposure during sleep.
Related Topics:
How to Choose the Right Bathroom Remodeling Contractor
How to Style Modern Queen Bedroom Sets Like a Designer