Ceiling fans play an essential role in providing comfort and ventilation in any room. However, if the fan doesn’t work as it should, it can be a real annoyance. Fixing a ceiling fan mounting bracket is one of the simplest tasks you can do to ensure that your fan is working properly. This guide will show you how to remove and replace the bracket, as well as how to fix a wobbling or wobbly bracket. By following these simple steps, you will be able to restore your fan to its former glory in no time!
What is the ceiling fan mounting bracket?

The ceiling fan mounting bracket is the small rectangular piece of metal that attaches to a hole in your ceiling and holds the pull chains (usually plastic strips) from moving around. This tool can easily be removed and replaced as needed, but should also be inspected for any damage before you try this out on your own.
How to fix a ceiling fan mounting bracket?
There are a few simple steps you can take to fix a wobbling or wobbly ceiling fan mounting bracket:
1. Remove the screws that hold the bracket in place (usually located on each side of the hole). Once these screws have been removed, carefully pry off the bracket from the ceiling. If it’s difficult to remove, use a screwdriver to pried up on one edge of the bracket until it pops loose. 2. Inspect the bolt head for damage or wear, as this will affect how easily it can be removed from your ceiling fan mounting bracket. Use tweezers if you need to remove any rust deposits so that the bolt can easily slide out of place.
3 . Clean off all dust and debris from around the base of your metal ceiling fan mounting bracket using a soft brush (cloth or dental pick). This is important because dirt could cause corrosion damage in a matter of hours. Keep all the screws and brackets on hand if you need to remove your ceiling fan replacement parts again or sell them to someone else. If replacing these components, remember not to lose either part – the bracket is easily identified by piercing an L-shaped hole at each end (typically found near each switch) , while screws are located along this mounting holes .
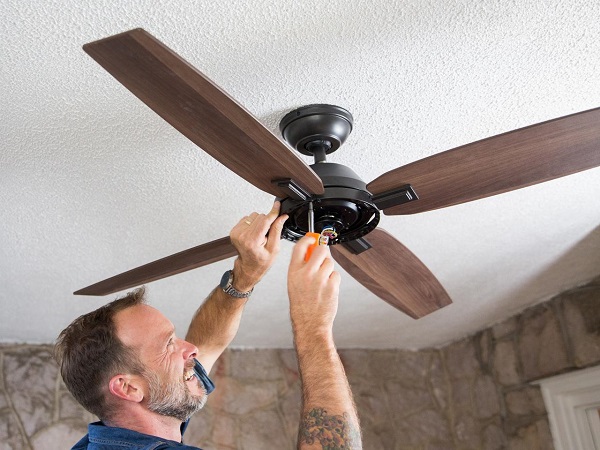
4 . After cleaning off all debris from around the base of your ceiling fan, install your new bracket. You can use the provided screws to fasten in place and secure it into place over any holes that were previously drilled through any flooring – this will help stop wobbling even more!
5 . Once all four brackets have been installed, you’re ready for a test drive of your newly fixed ceiling fans. Remember Inspect all wiring with a voltage tester before plugging in each individual part so that you don’t drain the ceiling fan’s capacitor. Make sure you turn all fans on and see if they are balanced properly – this is especially important for any large or industrial-sized mechanical ceiling fan installations in your business!
Ceiling fan mounting brackets are one of the most common home repairs that homeowners face. Unfortunately, they can be quite a hassle to fix. In this blog, we will show you how to fix a ceiling fan mounting bracket in just a few easy steps. Make sure to bookmark this page and come back to it whenever you need help fixing your ceiling fan!